9,145 total views, 22 views today
Hello everyone, Welcome to blog.sunnydoshi.in. This blog post covers how to Social Login with Facebook and Google in Laravel application by storing user profile data in our MySQL database. It’s very easy to work with login and register functionality in Laravel 5.6 using socialite package. The complete code can be found in Github.
There are many different sites and packages which you can integrate on your site to provide social login functionality. Laravel has released its own package name Socialite which you can use in your projects. Currently socialite support Facebook, Twitter, Google, LinkedIn, GitHub, GitLab and Bitbucket. Lets get started.
Table of Contents
- Migrations
- Installation and Configuration of Socialite
- Social Login With Facebook
- Social Login With Google
- Official Documentation
- Steps to use Github code
For basic installation laravel go through this tutorial – Laravel 5 Basic Auth Installation. After installed laravel basic auth Do Not Run migration, Because there are a few things I want us to make changes to before creating the users table. But you can use any migration of your choice.
Migrations
As you can see inside database/migrations of your project, you will notice that Laravel already comes with some migrations for creating the users and password resets tables.
We will use the migration for creating the users table in this example but you can use any migration of your choice. There are a couple things I need us to make changes to before creating the users table.
A user created via OAuth will have a provider and we also need a provider_id which should be unique. Also, when creating users via OAuth we will not be passing any passwords, therefore, we need to set the email & password field in the migration nullable. Here, we are doing the following: adding provider and provider_id columns to the users table.
The up method in your migration should look like this:
public function up()
{
    Schema::create('users', function (Blueprint $table) {
            $table->increments('id');
            $table->string('name');
            $table->string('email')->nullable();
            $table->string('image',255)->nullable();
            $table->string('provider');
            $table->string('provider_id');
            $table->string('password',255)->nullable();
            $table->rememberToken();
            $table->timestamps();
    });
}
Now add provider and provider_id to fillable attributes in the model in our case User Model in app/User.php.
protected $fillable = [
         'name', 'email', 'image', 'provider', 'provider_id', 'password',
];
If you have not run make:auth command earlier when installed laravel basic auth then, To make use of the default Laravel authentication, we need to run the command below:
$ php artisan make:auth
Next, run the following command for migration,
$ php artisan migrate
Next, run the following command for project executing:
$ php artisan serve
This will run Laravel default web server and you can access it using http://localhost:8000.
Installation and Configuration of Socialite
Now in your laravel project run the following command to install Laravel Socialite package.
$ composer require laravel/socialite
Now, add the service provider to the config/app.php file.
In the providers array, of config/app.php add
<?php

// app.php

'providers' => [
    // Other service providers...
    Laravel\Socialite\SocialiteServiceProvider::class,
],
In the aliases array of the same file, add
<?php

// app.php

'Socialite' => Laravel\Socialite\Facades\Socialite::class,
Now Socialite is all set up and you are ready to implement social login in your Laravel apps.
Social Login With Facebook
Visit the link to register your app. Login via your Facebook account. You will see something like this. Select ‘Create App’ option in the drop down.
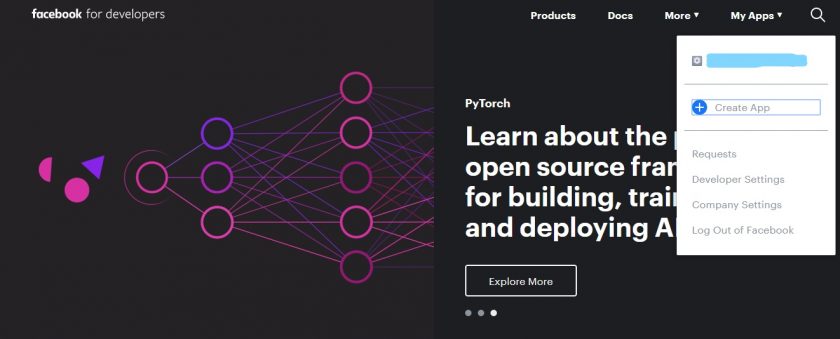
Facebook Developer Account – blog.sunnydoshi.in
Fill your app details like app name, contact email.
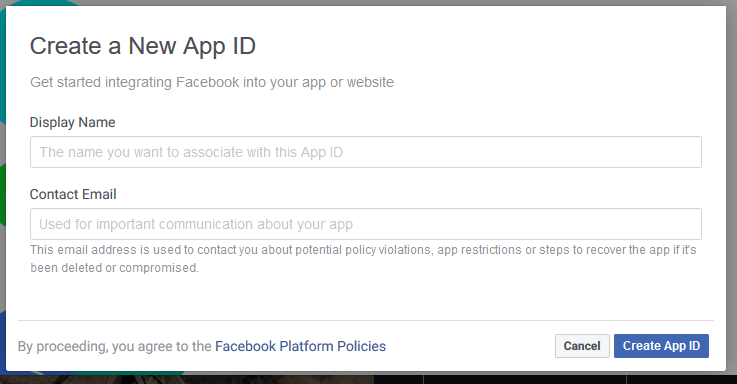
Create App – blog.sunnydoshi.in
You’ll be redirected to a page as shown below.
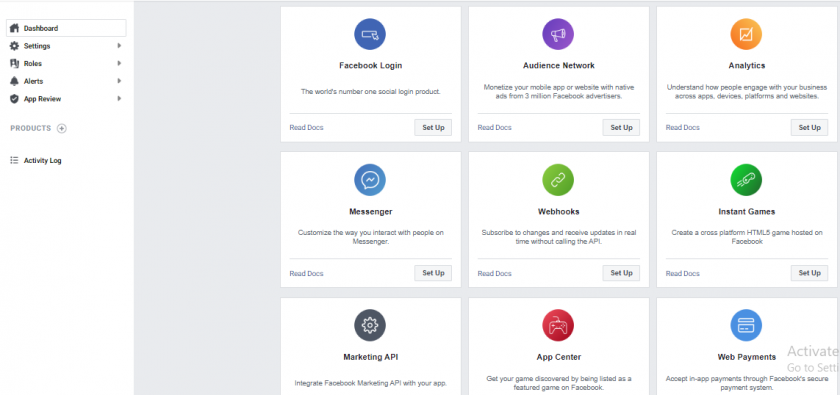
Dashboard – blog.sunnydoshi.in
Click on Basic under the Settings tab by the left of the page.
You need to fill in the details of App Domains in our case localhost.
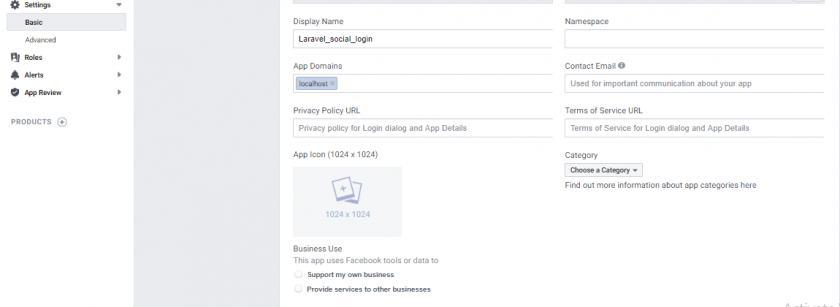
App Domains – blog.sunnydoshi.in
Scroll down and click on the button “Add Platform” it would show a modal and you’re to select website url. When you try to login via facebook and if you have not added the domain in your Facebook app. You will get following error:
Can’t load URL: The domain of this URL is not included in the app’s domains. To be able to load this URL, add all domains and sub-domains of your app to the App Domains field in your app settings.
Solution: You need to add the platform to your Facebook dashboard and in that type your project’s root URL like this.
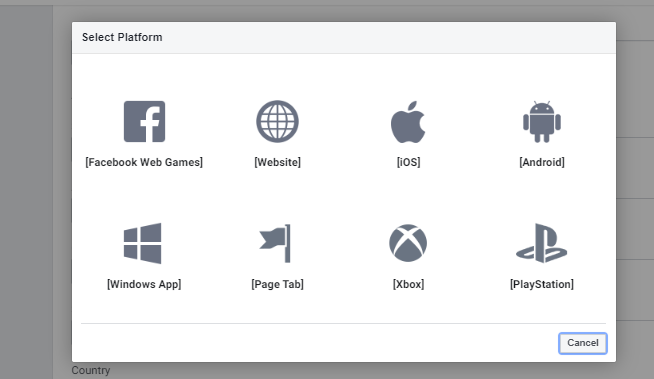

Add Platform – blog.sunnydoshi.in
Add the following to config/services.php
<?php

// services.php

'facebook' => [
        'client_id'     => env('FACEBOOK_CLIENT_ID'),
        'client_secret' => env('FACEBOOK_CLIENT_SECRET'),
        'redirect'      => env('FACEBOOK_URL'),
    ],

'google' => [
        'client_id'     => env('GOOGLE_CLIENT_ID'),
        'client_secret' => env('GOOGLE_CLIENT_SECRET'),
        'redirect'      => env('GOOGLE_URL'),
    ],

'twitter' => [
        'client_id'     => env('TWITTER_CLIENT_ID'),
        'client_secret' => env('TWITTER_CLIENT_SECRET'),
        'redirect'      => env('TWITTER_URL'),
    ],
Add the following to .env file
FACEBOOK_CLIENT_ID= Your Facebook Client ID
FACEBOOK_CLIENT_SECRET= Your Facebook Client secret
FACEBOOK_URL=http://localhost:8000/login/facebook/callback

GOOGLE_CLIENT_ID= Your Google Client ID
GOOGLE_CLIENT_SECRET= Your Google Client secret
GOOGLE_URL=http://localhost:8000/login/google/callback

TWITTER_CLIENT_ID= Your Twitter Client ID
TWITTER_CLIENT_SECRET= Your Twitter Client secret
TWITTER_URL= http://localhost:8000/login/twitter/callback
At facebook developer account, Copy the content of APP ID and App Secret from the settings dashboard into FACEBOOK_CLIENT_ID and FACEBOOK_CLIENT_SECRET respectively.
Now, We need to create one controller, which handles the Social Authentication routes. Run the following command in your project root directory.
$ php artisan make:controller SocialAuthController
Add the following method to the controller SocialAuthController.php. This method handles redirect from our site to the OAuth provider.
<?php
use Socialite;

class SocialAuthController extends Controller
{
    public function redirect($provider)
    {
        return Socialite::driver($provider)->redirect();
    }
}
Next, We need to set route in routes/web.php. The route will be used for both Facebook and Google OAuth authentication to be integrated into this tutorial.
Route::get('login/{provider}', 'SocialAuthController@redirect');
After successful login, it will redirect to the URL we have set as our callback URL. Add this in routes/web.php.
Route::get('login/{provider}/callback','SocialAuthController@Callback');
Next we want to perform callback functions which include log in the user to their profile if the user exists or create new user. To handle that, the callback method add the following code in SocialAuthController.php:
<?php
use Auth;
use App\User;

class SocialAuthController extends Controller
{
      public function callback($provider)
      {
           $userSocial = Socialite::driver($provider)->user();
           $users = User::where('provider',$provider)
                        ->where('provider_id',$userSocial->getId())
                       ->first();
           if($users){
              Auth::login($users);
              return redirect('/');
           }else{
              $user = User::create([
                'name'          => $userSocial->getName(),
                'email'         => $userSocial->getEmail(),
                'image'         => $userSocial->getAvatar(),
                'provider_id'   => $userSocial->getId(),
                'provider'      => $provider,
              ]);
              return redirect()->route('home');
           }
      }
}
Now we need to add the link in view file which will further redirect the user to the facebook.
resources/views/auth/login.blade.php add one link div like Login With Facebook.
<div class="form-group row">
     <div class="col-md-6 offset-md-4">
          <a href="{{ url('/login/facebook') }}" class="btn btn-facebook"> Login with Facebook</a>
     </div>
</div>
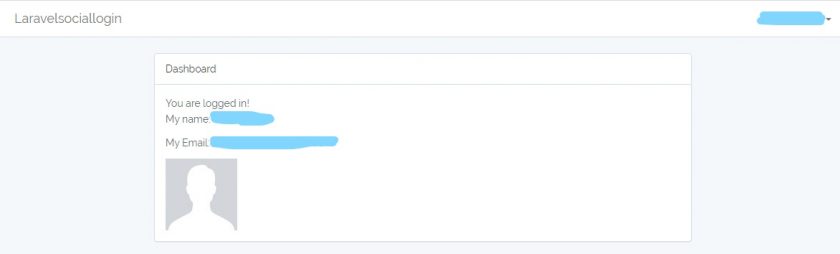
Check the home.blade.php view and add the following:
  <p>My name: {{Auth::user()->name}}</p>
  <p>My Email: {{Auth::user()->email}}</p>
  <img alt="{{Auth::user()->name}}" src="{{Auth::user()->image}}"/>
Now, if you have not started the server, then launch the server and go the URL: http://localhost:8000
Try to login via Facebook and if everything sets up correctly.
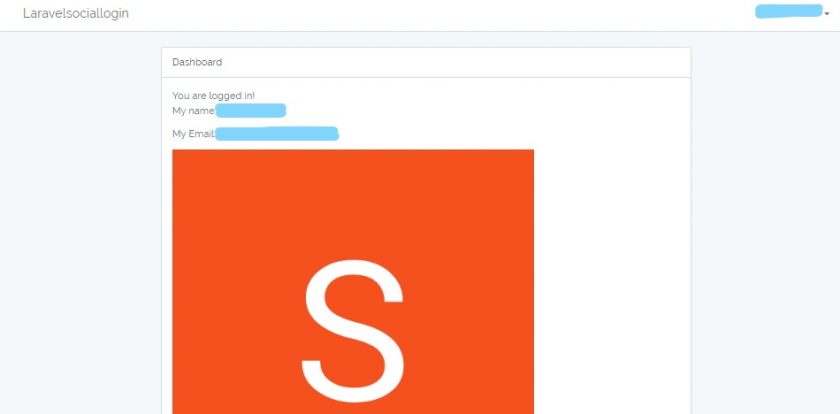
After successful login, you would see your name, email, and avatar on the homepage.
Possible Error:
cURL error 60: SSL certificate problem: unable to get local issuer certificate.
Possible Solution:
Assuming On Windows: XAMPP server
Similar to another environment – Download and extract for cacert.pem file.
Put it here: D:\xampp\php\extras\ssl\cacert.pem
In your php.ini (“D:\xampp\php\php.ini”) put this line in this section:
;;;;;;;;;;;;;;;;;;;;
; php.ini Options  ;
;;;;;;;;;;;;;;;;;;;;

curl.cainfo = "D:\xampp\php\extras\ssl\cacert.pem"
Finally, restart your server.

Live laravel Facebook app with public
Right now your application is in development mode, So when you try to login with another Facebook username and password then It will not work.

For that, you need to do the following steps:
- Log in to Facebook Developer -> Select Your App
- In Settings -> Basic -> Contact Email. (Give any email)
- Scroll down there is Individual Verification section, Select Go to Verification.
- You can check also here in App Review tab -> Requests
- Do you want to make this app and all its live features available to the general public? Yes
And your app will be live now. Now, you will be able to log in as any Facebook user.
Done! We Have Successfully Implemented Facebook login to our Laravel app using Socialite.
Social Login With Google
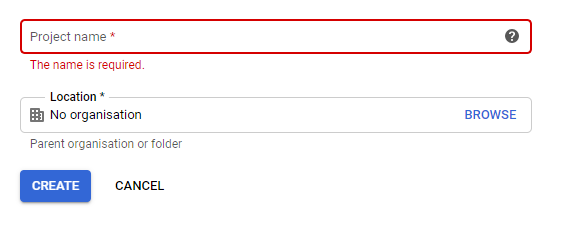
Visit the link to register your app. Click on “Select a Project” at the top side of dropdown which would show a modal where you’re expected to create a project from.

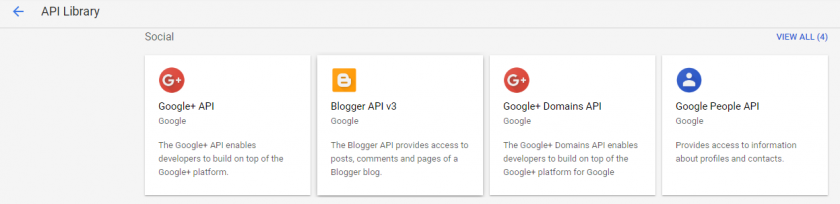
After the app is created, the redirects to the dashboard where we’re to Enable Apis and Services.
It redirects to the API library dashboard where you’re to select Google+ API under the Social section of the same page where you enable the Google+ API to our Laravel app.
You’ve successfully enabled Google+ API to your app, and it will redirect to another page but click on Credentials on the left side of navigation and select OAuth consent screen tab and fill out the details there. Like Project name, Homepage URL, Product URL, Privacy Policy URL and Terms of Service URL.
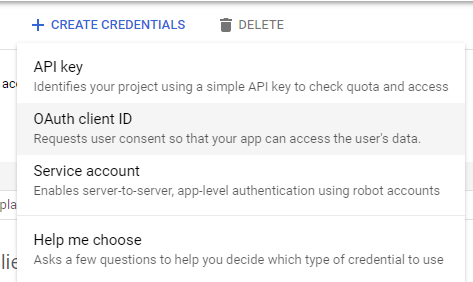
Now we need to create credentials for your app. Click credentials in left side navigation and select Credentials. In the drop-down select OAuth client ID.
In the OAuth client ID screen, select the type of application, and fill the details. There is Authorized redirect URLs field in form, Add to this url: http://localhost:8000/login/google/callback
Copy the content of client id and client secret to GOOGLE_CLIENT_ID & GOOGLE_CLIENT_SECRET respectively of your .env file.
Now we need to add the link in view file which will further redirect the user to the google.
resources/views/auth/login.blade.php add one link div like Login With Google.
<a href="{{ url('/login/google') }}" class="btn btn-google-plus"> Login with Google</a>
Note: The routes and controller have already been done earlier on.

If not logged in, we would be redirected to the page above.
After successful login, you would see your name, email, and avatar on the homepage.
Done! We Have Successfully Implemented Google + login to our Laravel app using Socialite.
Official Documentation
Documentation for Socialite can be found on the Laravel website.
For package: Check Here
Steps to use Github Code clone repo in your local. Run following commands in Command Prompt OR Open Git Bash for Windows:
- Redirect to desired directory (project root folder) where you want to place your code.
- From Local machine, Start the Apache and MySQL services from xampp or wamp whatever you use.
- Run
git clone https://github.com/isunnydoshi/laravel-social-login-with-socialite.git - Create a MySQL database for the project.
- Copy .env.example to .env file and add your app settings and database settings in .env file:
cp .env.example .env - Run
composer install. This will install all vendor dependencies and Laravel Framework. - Configure developers account for facebook and google to get client_id and client_secret and also put in .env file.
- Run
php artisan key:generate. This will generate new APP_KEY. - Run this command for clear cache:
( $ php artisan config:cache
$ php artisan config:clear ) - Run
php artisan migrate. This will run the Migration and will create tables for authentication module. - Run
php artisan serve. This will run Laravel default web server and you can access it usinghttp://localhost:8000
I hope you learned something. If you did, feel free to share this article with a friend or on social media. Let me know if you have any questions, comments or feedback – either via Twitter or email.
Also, don’t hesitate to subscribe to newsletter if you like this article.